In some rare cases, file sharing clients can be hindered from connecting correctly because the Windows firewall blocks either incoming or outgoing connections. Admittedly, this doesn’t happen very often, since modern P2P clients tend to automatically setup exceptions in the firewall. If, however, you can’t find any other reason why you cannot accept incoming connections, or even connect at all, it might be a good idea to go through this guide and check if it helps.
However, if you want to accept incoming connections, i.e. get a “High ID” in eMule, remove the yellow status icon in uTorrent titled “No incoming connections”, you might want to look at our Port Forwarding Tutorial first.
The procedure is identical for both Windows 7 and Windows 8.1. For Windows 8, only the first few steps are different.
For Windows 8
If you’re running either Windows 7 or 8.1, proceed to the next step.
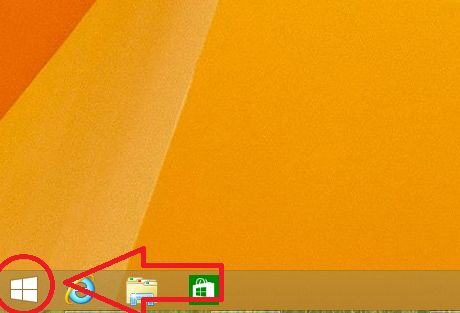
1. Open the tiles by clicking on the Windows logo in the lower left corner of the screen.
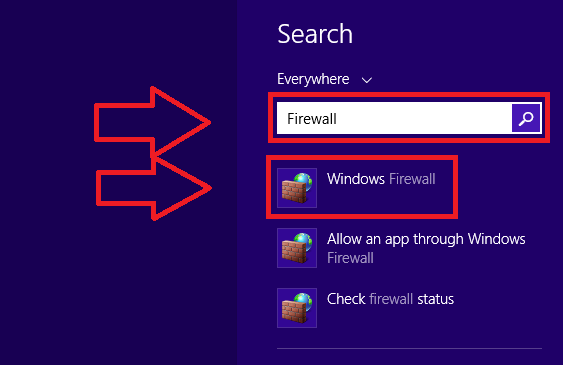
2. Type in “Firewall” in the search box to the right, and click on “Windows Firewall” to open the configuration.
Proceed to step 4 of the tutorial for Windows 7 and 8.1.
For Windows 7 and 8.1
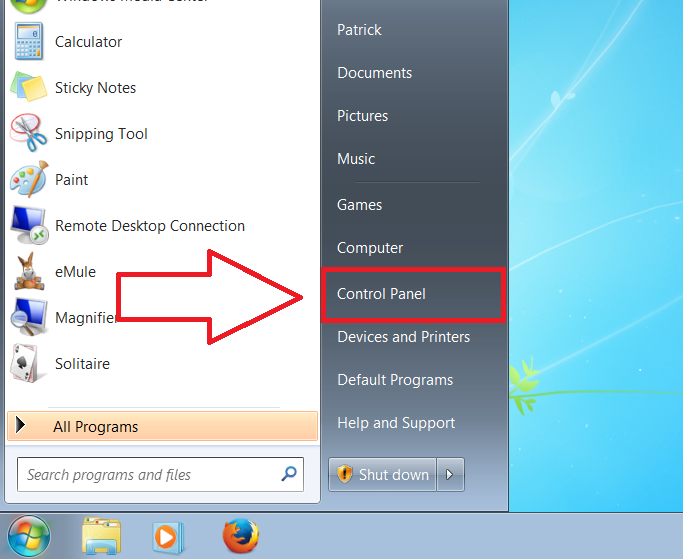
1. Open the Control Panel by clicking on the Windows icon in the lower left of the screen, and then selecting “Control Panel”.
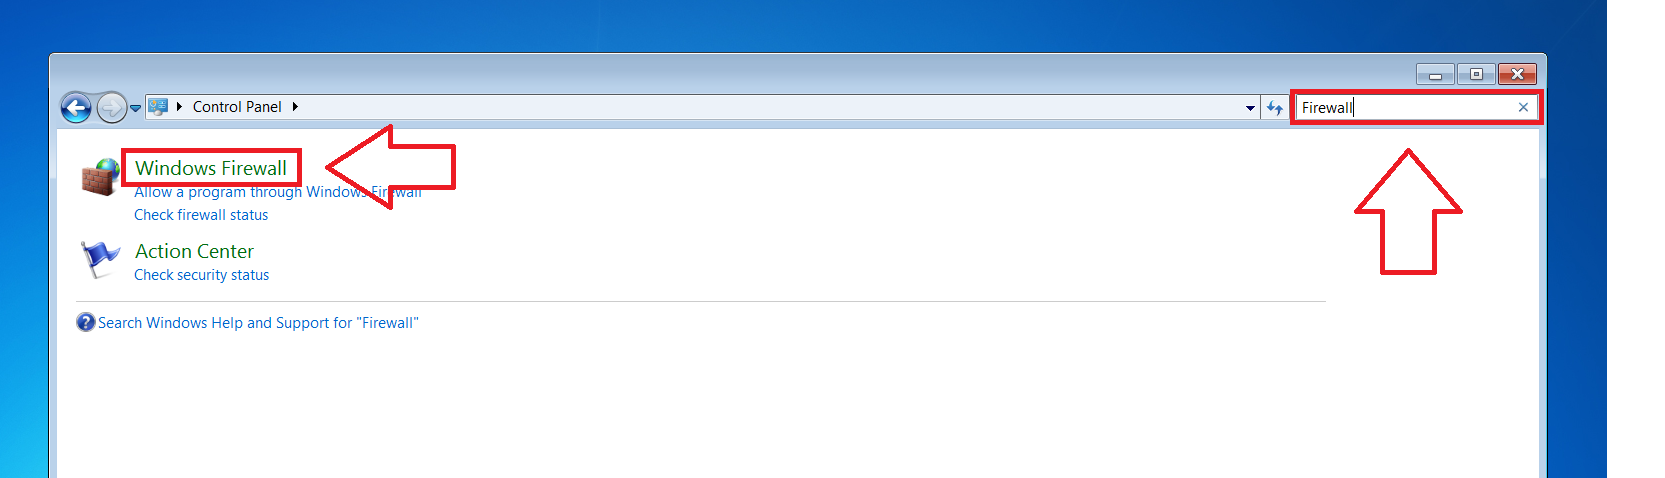
2. Enter “Windows Firewall” in the search box to the upper right, and click on “Windows Firewall”.
3. Now choose “Advanced settings”.

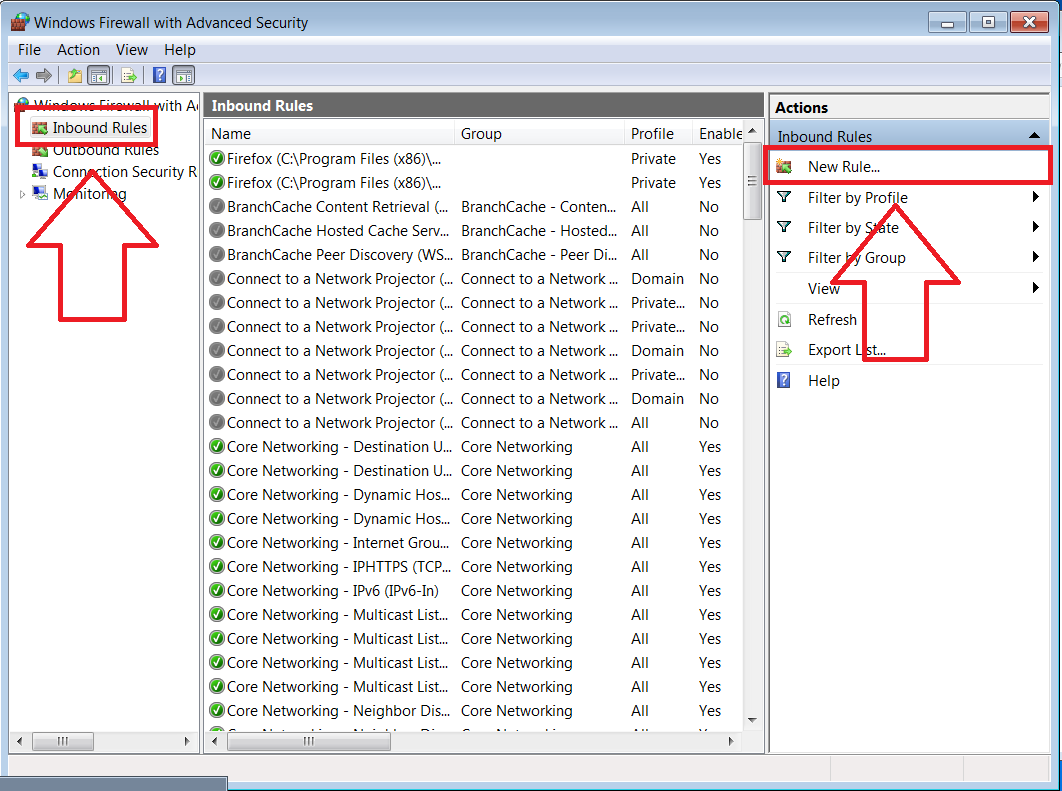
4. Now, scroll through the list and check if there is already a rule for the program you want to add. If yes, you can try to delete the rule and create a new one.
To create a new firewall exception, click on “New Rule” to the right of the screen.
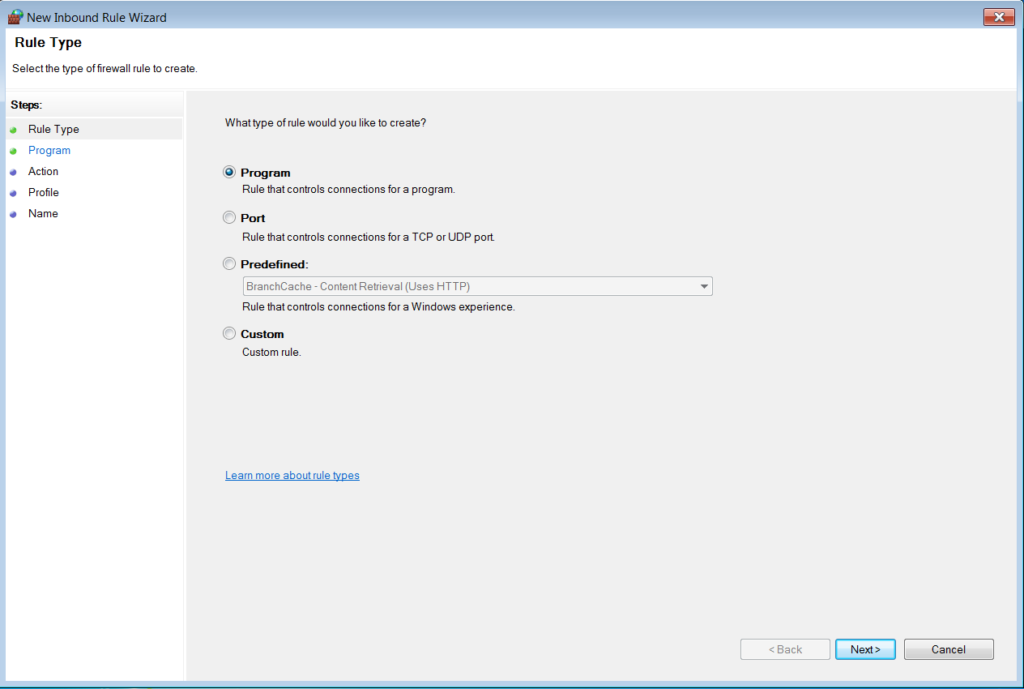
5. Select “Program” and hit “Next” on the lower right.
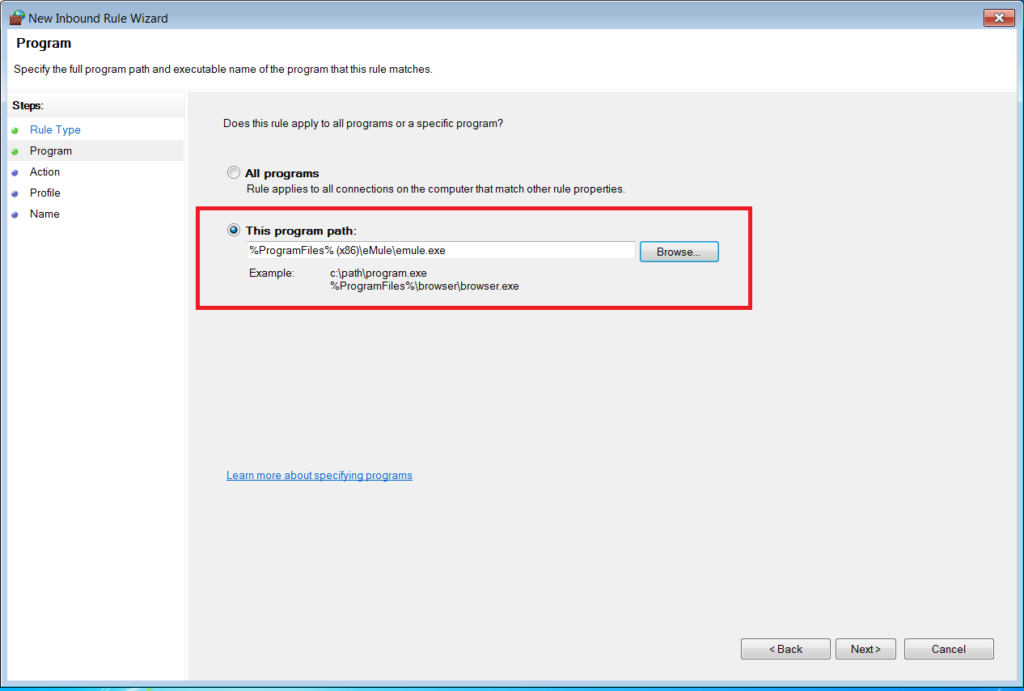
6. Now, hit “Browse” and search for the .exe-file of the application you want to add. Doubleclick on the file, hit “Next”.
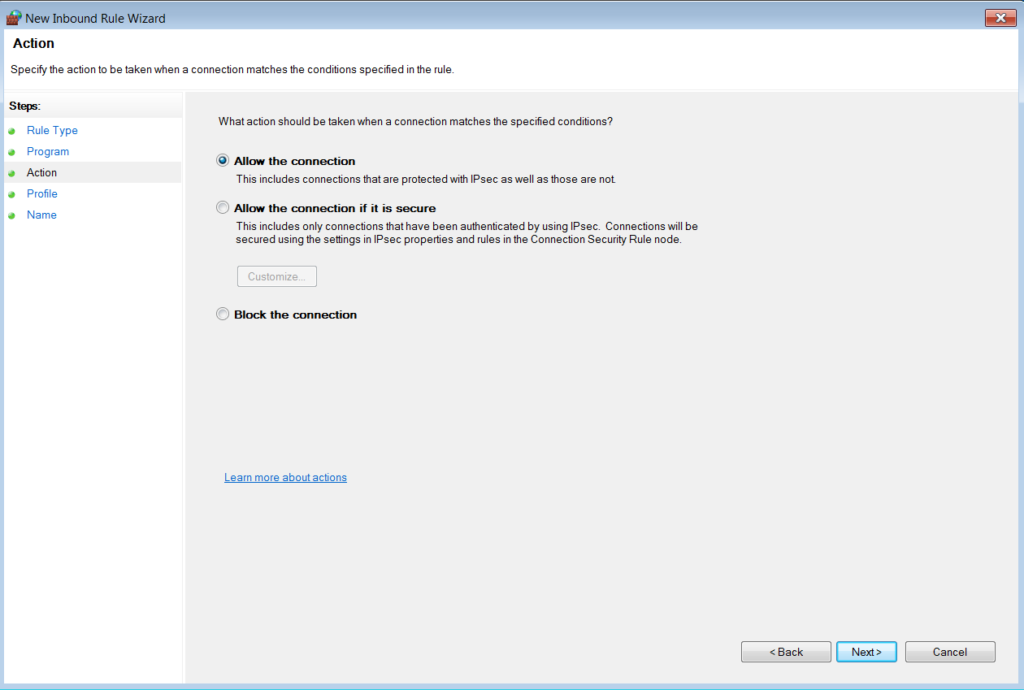
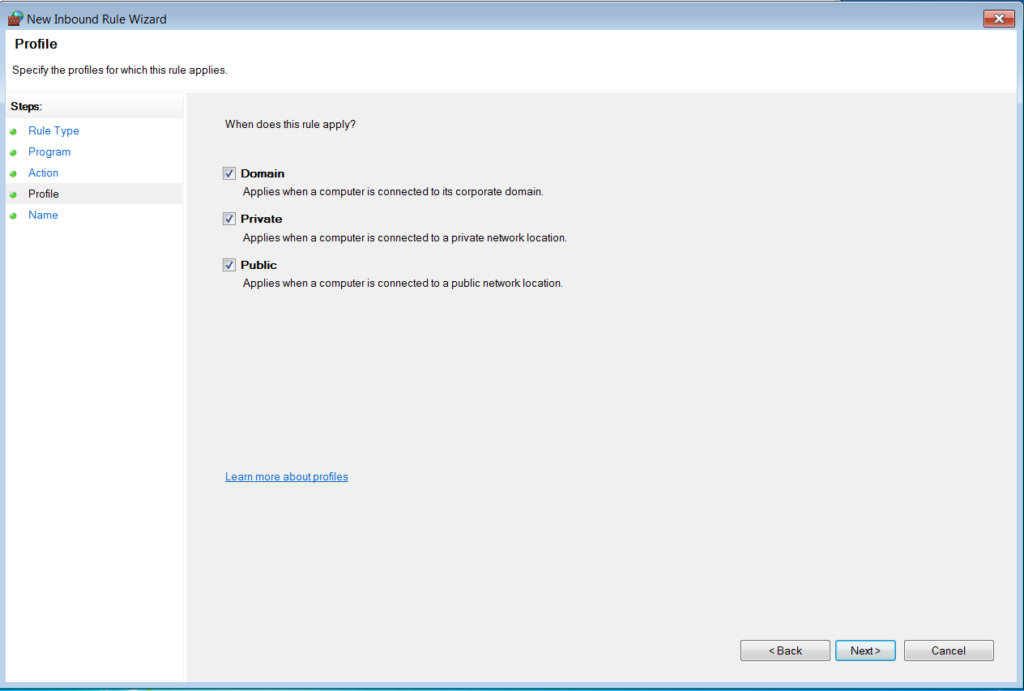
7. Select “Allow the connection” and click “Next”.
8. Click “Next”.
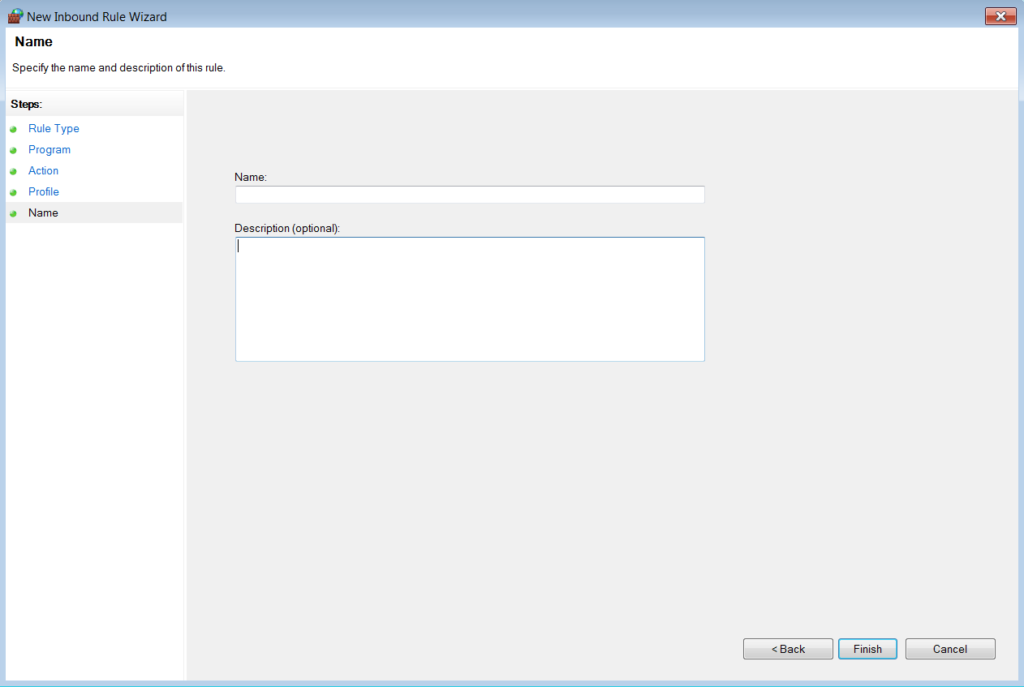
9. Enter the name of the program (or any other description you like) and click “Next”.
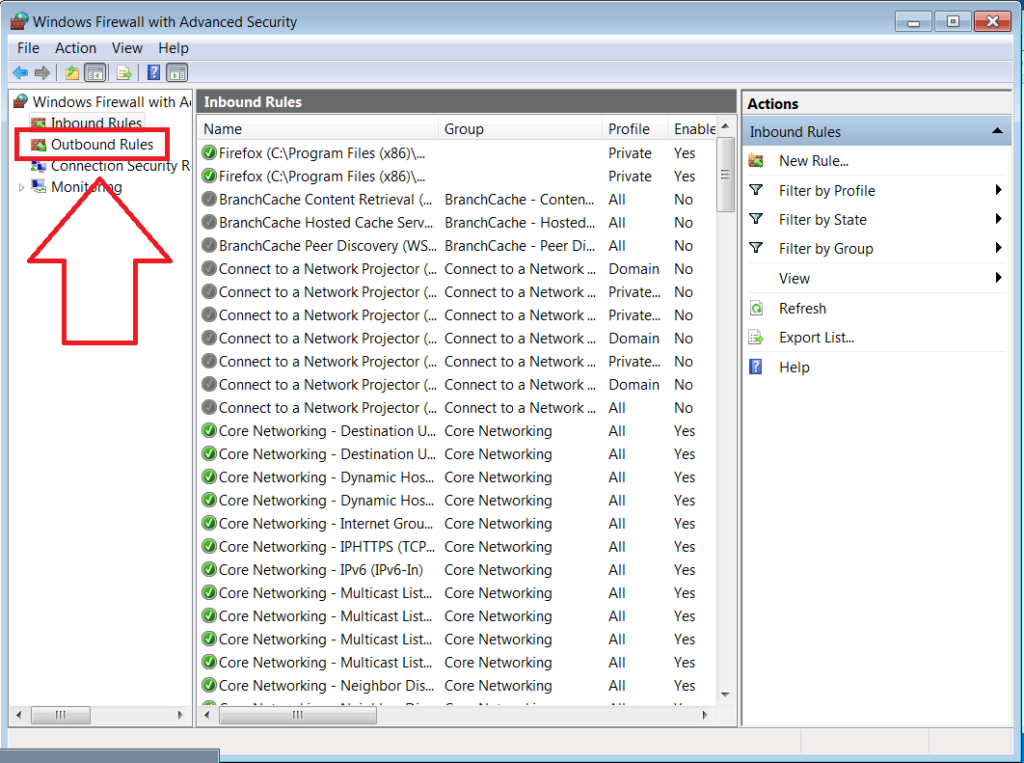
10. Now, repeat everything from step 4, but this time select “Outbound Rules”.
After going through these steps, check if this did the trick. If not, go back to our port forwarding tutorial and check the other options; Windows Firewall is not the most prevalent problem, but it can’t hurt to check.
