ADVANCED GUIDE: You don’t need to go through this guide to use Ares Galaxy, but it can help you to customize the client to your needs. The most important points are mentioned above, the other, more subtle options are explained below.
To access the settings, click on “Control Panel” on the upper part of the screen.
General

First of all, if you’re not a native English speaker, you might want to switch to a different language under “Preferred Language”.
– “Load Ares when windows starts” is good for the network, as the software automatically starts sharing and offering the files you selected to other users as soon as it’s started and connected. However, it can also slow down your computer and consume bandwidth even when you don’t use the software, so decide what is more important to you.
– The same goes for “Auto-connect to network when I start Ares“, and also it saves you from always having to click the “Connect”-button when starting the client, so we can only recommend to check this box.
– “Show status in main window’s caption” is just a cosmetic option, feel free to leave it on or off as you like.
– “Exit Ares when I click the close button” stops the client from minimizing to the taskbar when you try to close it, and makes it easy to completely close the software if you don’t like to have it run in the background all the time.
– We don’t know what “Block large hints” does, if you find out feel free to leave us a comment.
– “Pause video when moving between tabs” is interesting if you use the integrated video player, and does exactly as it says.
Transfer

The settings here are mostly technical in nature and might be a bit complicated for unexperienced users, but can be important to get better downloading speeds and various other things, so please don’t skip this if you want to optimize Ares for maximum performance.
– “Accept incoming connections on port: XY” helps the network and also you, because it allows not only you to connect to other users but also others to connect to you and request files. Also, it allows you to connect to some other people and clients you usually can’t connect to, which results in more peers, more downloading sources, and thus can help you to get better downloading speeds and access rare files.
To accept incoming connections, google how to setup Port Forwarding on your router or firewall. It is usually not very complicated to do (and by the way we have a guide about it as well).
If you are behind a VPN however, which we always strongly recommend to anonymously share files and stay away from prying eyes, you need a VPN that allows port forwarding. We have compiled a list of VPNs that are best to fully use the potential of all file sharing networks and supports port forwarding. As a bonus, you don’t need to change any settings on your router if you use a VPN with port forwarding.
Click here for our list of VPNs with port forwarding
Does that mean you need to have open ports to use this program? No, but it can’t hurt either for maximum performance.
– “Show transfer percentage” is a cosmetic change, and removes the percentage value on the Transfer tab. We usually leave it off.
– “Ask for confirmation when cancelling downloads” protects you from accidentally deleting a download you didn’t want to cancel, a good feature if you have fidgety fingers or like to mindlessly hit keys on your keyboard… happens to everybody sometimes, so we like to keep it on.
– “Transfer” allows you to control how many downloads can run at once, how many users can download from you at once and how many users can occupy one slot. You can mess around with it if you want, but don’t get too creative especially if the settings regarding uploading; it can seriously mess up the downloading experience of others in the network who get files from you.
– “Bandwidth” helps you to limit the speed of both downloads and uploads, and is especially important if you feel your Internet connection clogging up when using the software. We recommend you to use around 80% of your maximum Internet bandwidth in both uploading and downloading. If you don’t know how fast your connection is, you can do a speed test at sites such as Speedtest.net.
Note that 1 Mbps is = 128 Kbps, so if, for example, the speed test results in 30 Mbps down and 5 Mbps up speed, our suggestion would be to enter 3072 Kbps down and 512 Kbps up as your limits. Formula: (test result in Mbps * 128) *0,8
Feel free to play around with this to suit your needs.
– “Increase on Idle” lifts these values up when you’re not in front of your PC (at least we think this is what it does…), feel free to also play with this as well.
– “Download folder” shows you where your downloads will be saved to, and you can basically use any folder you like.
Chat
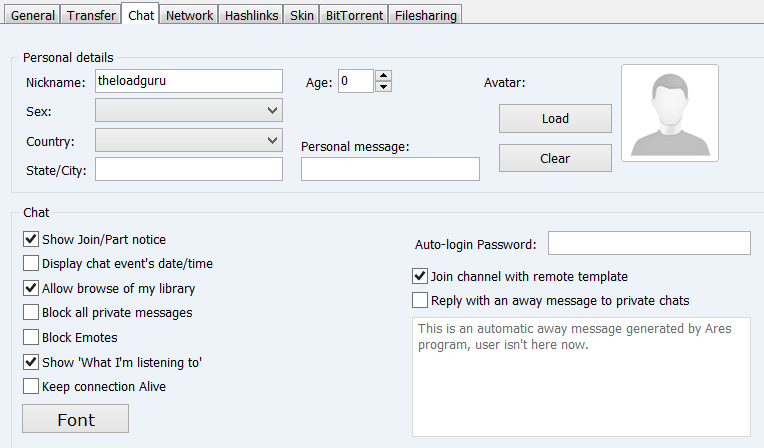
As we don’t think most users use the chat feature too much, we’ll skip this tab. Most options should be self-explanatory anyway.
Network
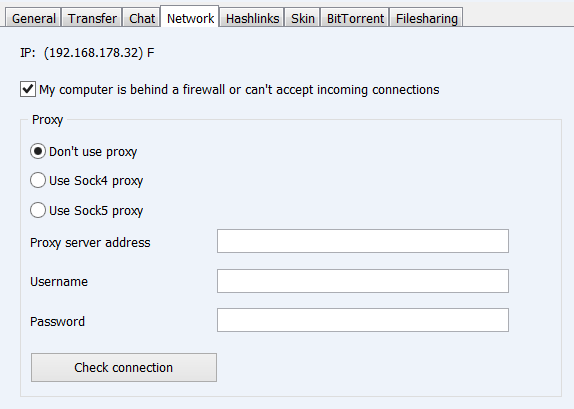
– “My computer is behind a firewall or can’t accept incoming connections” should be ticked if you haven’t setup any port forwarding (see our notes above on this subject).
– “Proxy” allows you to configure a proxy if you need one to connect in your network, as it is required in some places. It’s not very common these days however. You could also enter the data of an anonymization service if you want to share files anonymously, but be very cautious: We don’t know if the implementation really stops any data leaks, and most service that offer anonymous proxies also include a VPN, so don’t rely on this for your privacy.
Hashlinks
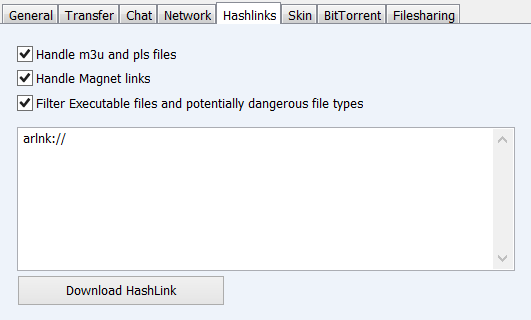
– “Handle Magnet links” is useful if you want to use Ares for BitTorrent, so tick this if you want to replace your torrent client with Ares. We recommend to use a more up-to-date client such as uTorrent or Vuze for torrents though.
– We frankly don’t exactly know what “Handle m3u and pls files” does. Both are music playlist files, no idea what this has to do with Ares. If you figure it out, please leave us a comment.
– “Filter Executable files and potentially dangerous file types” is a very useful option. You shouldn’t download any software from Ares either way, so always leave this on unless you really know what you’re doing, as this will greatly reduce the risks of using Ares.
Skin
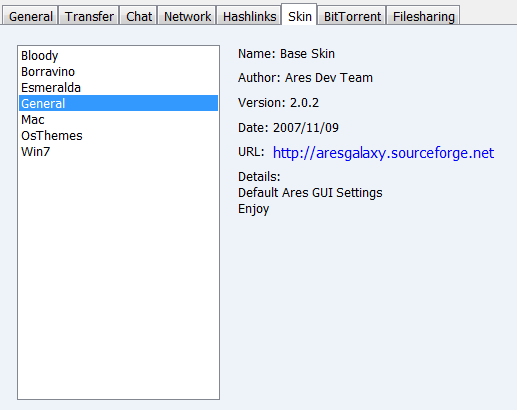
For all the layout and design fanatics among you. Choose the one you like most.
BitTorrent

These are the options for the BitTorrent functionality of Ares.
– If you want to use Ares for torrents, check the “Make Ares my default torrent client” box to associate torrent files with it. If not, uncheck it.
– “Download folder” is the folder where torrent downloads are saved. You can choose any directory to want.
Filesharing
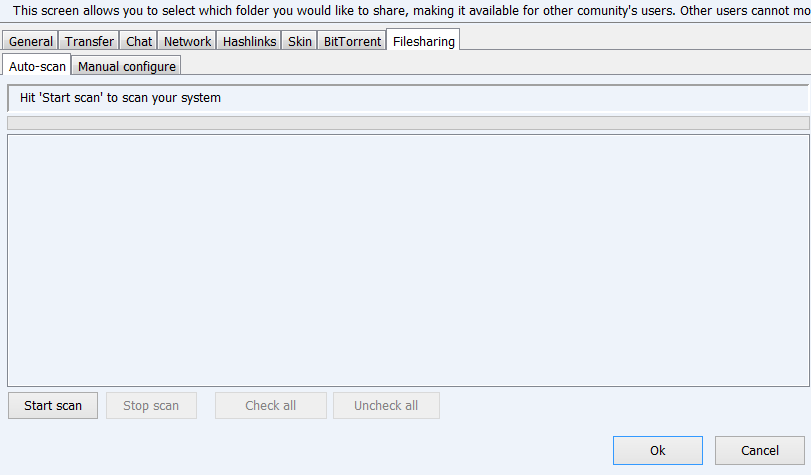
Sharing files is essential to a file sharing network, and so if you want to participate it would be a very nice gesture and also give you some karma points for your next life. Keep in mind that sharing copyrighted material is very evil though and will make you burn in hell for all eternity. It might also be illegal in your jurisdiction, so be careful with what you do. We’re not responsible for your actions.
Also, there is always the option to use a VPN for privacy if you don’t like being tracked.
There are two different options to find files to share: Auto-scan and Manual configure.
– “Auto-scan” scans through your computer to find content to share. Be careful not to share any personal files you wouldn’t want everyone to see and carefully select and deselect the directories and files you want to be available to others users in the network.
– “Manual configure” allows you to manually go through your folders and select what you want to share. Recommended for most users.


