To use Binreader, you don’t have to go through all the options. Here are the most important things:
– Enter your provider information under “Server”.
– Activate SSL (encryption) in the same tab.
– For maximum performance, check the following option under “Advanced”: “Buffer downloads in memory”, and increase the number of connections until you get full speed.
ADVANCED GUIDE: You don’t need to go through all these options, but it can help you get the most out of the software. The most important points are mentioned above, read on for a more detailed explanations of all important options.
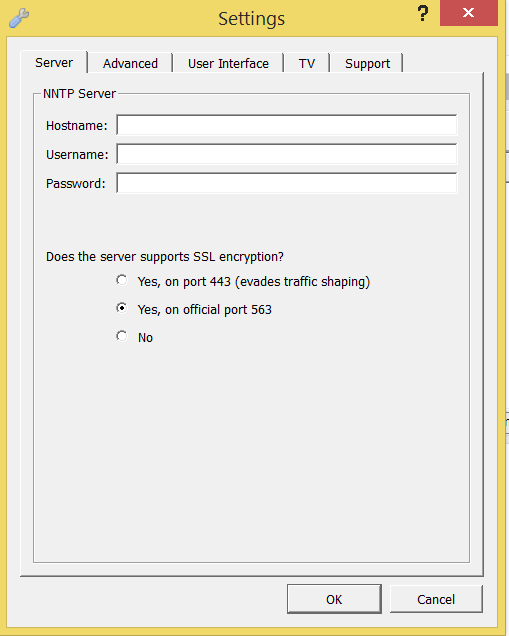
– “Hostname”, “Username”, “Password”: Here, you enter the details of your Usenet provider.
– “Does the server supports (sic) SSL encryption?”: The answer is most likely “yes”, and we recommend you activate encryption. Most providers use port 563, but you may experiment a bit and use port 443 if you encounter slow download speeds.
Advanced
In this tab, you can find quite a few interesting options that will make your life easier, and downloading run smoother.
– “Maximum number of connections to server”: Definitely use most than 4 here, we recommend at least 8 for slower connections, and in many cases much more for high-speed Internet. You can experiment a bit with this if you want, just increase the number until you get full speed. Many providers allow 60 connections or more, although this is not needed most of the time and can actually lead to some problems.
Don’t overthink this though. 20 or something should be fine for most people.
– “Buffer downloads in memory (less disk IO)”: Anyone with a few gigs of RAM should at least try to check this option, as it will dramatically decrease the stress the newsreader produces on your PC. If you don’t, your PC might get a bit slow during downloading.
– “Only download PAR2 repair blocks if post is incomplete”: Saves traffic and disk space, we recommend to keep this on as long as you stick with the automated download handling.
– “Automatically repair downloads (using par2)”: Unless you like processing downloads by hand, by all means leave this on!
– “Remove files from download list when finished”: Self-explanatory. Decide for yourself what suits you best.
– “RAR handling”: We love the “Start extracting while you download“-option, as it saves a lot of time. You can also opt to disable the whole thing, but then you might need to do all the extracting yourself, which can suck unless you’re a super-nerd or something.
– “Download folder”: Here, you can change the directory to which files are downloaded.
– “NZB monitor folder”: Binreader can periodically scan a folder on your hard drive for NZBs, and automatically download them, without you having to add each NZB to the downloading list. Can come in handy, decide for yourself.
We recommend you leave the other options as they are, unless you really know what you’re doing.
TV
Here, you can select a TV or other media device to stream media to via DLNA. Can come in handy, but this is beyond the scope of this tutorial.

Comments are closed.